Extended Fork Pipe for Ceiling Fan
Optional Pipe with different length can be purchased from Panasonic service shop or
authorized dealer.
- 16” Optional Pipe
- 24” Optional Pipe
- 30” Optional Pipe
- 36” Optional Pipe
- 42” Optional Pipe
- 48” Optional Pipe
- 54” Optional Pipe
- 60” Optional Pipe
Warning
Do not use modified Pipe.
It can cause Ceiling Fan drop and injury.
It can cause Ceiling Fan drop and injury.
Good Installation Practice

Before Installation
1. Read and understand the
instruction.
Different model are different in installation manner.
Before Installation
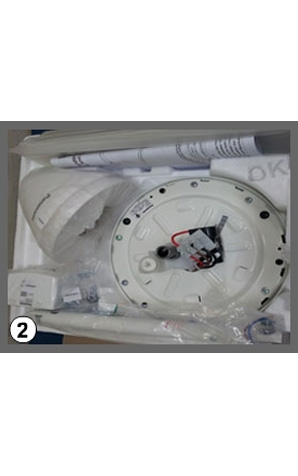
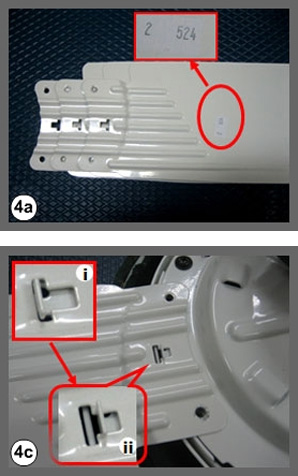
2. Inspect the contents in
the box.
Defect contents could cause problem.
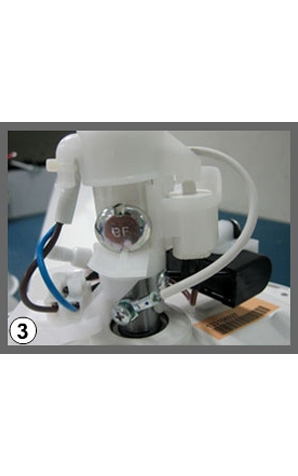
During Installation
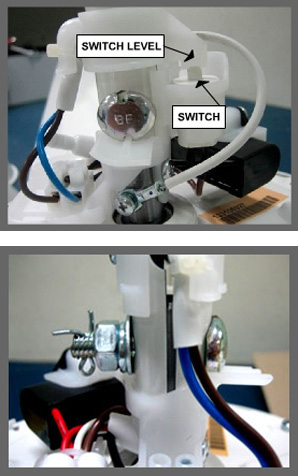
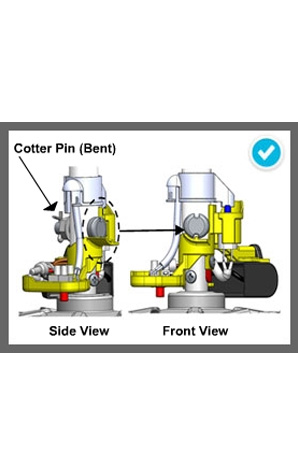
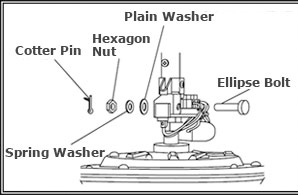
1. Insert Pipe Assembly to
Motor Shaft with supplied Ellipse Bolt, Plain Washer, Spring Washer, Hexagon Nut
& Cotter Pin.
Ensure Switch Lever press the Switch.Ensure Pipe has been
fully tighten to Motor Shaft. Can cause injury if ceiling fan drops.
During Installation
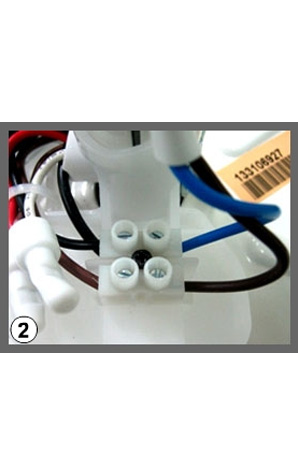
2. Ensure all the terminals
are connected correctly by qualified personnel.
To avoid electrical hazards.
During Installation
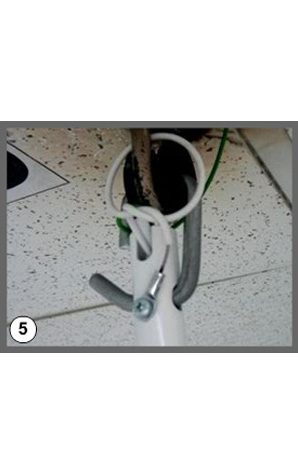
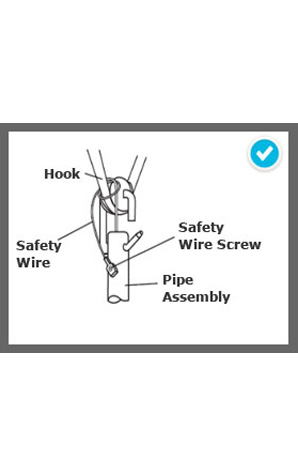
3. Safety Wire must be fixed
correctly to Motor Shaft ( slanting at 45° ). Ensure the Safety Wire not
contacting to the Motor Surface.
Can cause injury if Ceiling Fan drops.
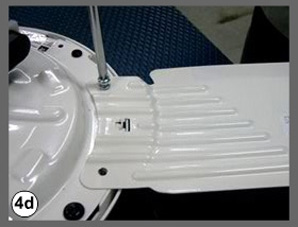
During Installation
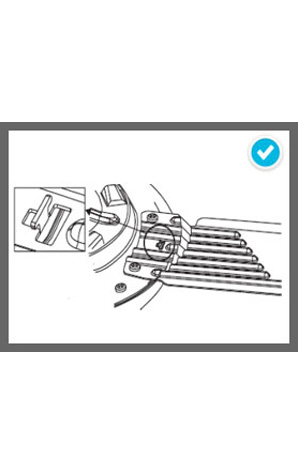
4. Blade fixing
a) Make sure all blades have the same weight. Different weight will cause
wobbling.
b) Do not bend the blades.
c) Blade hole must be locked to Cover Hook.
d) Tighten the Blades firmly with Screws. Can cause injury if Blade drops.
b) Do not bend the blades.
c) Blade hole must be locked to Cover Hook.
d) Tighten the Blades firmly with Screws. Can cause injury if Blade drops.
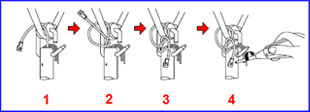
During Installation
5. Arrange and tie the Safety
Wire as shown in the picture below. Then, firmly screw the Safety Wire onto the
Pipe Assembly.
Can cause injury if Ceiling Fan drops.
During Installation
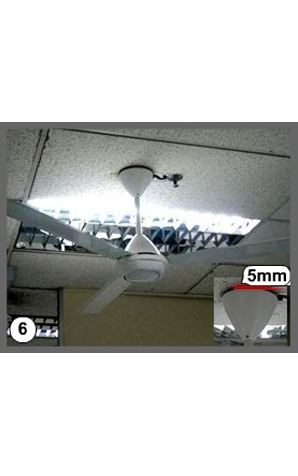
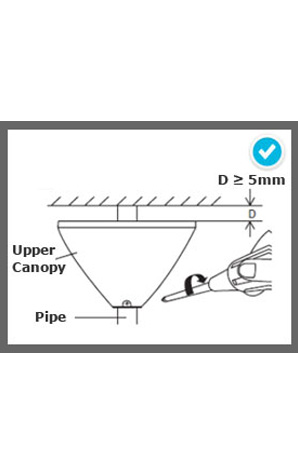
6. Ensure Upper Canopy not
contacting to the ceiling. (5mm gap between Upper Canopy and ceiling)
Can cause Ceiling Fan wobbling and noisy.
Check Point Installation
1. The safety wire is
securely fixed onto hanging hook.
Make sure the safety wire is securely loop and screw onto pipe.
Check Point Installation
2. Bolt & Nut at Motor is
securely fixed to the Pipe.
Make sure all the bolt, nut, flat washer, spring washer and cotter pin were
properly fix and tighten.
Check Point Installation
3. The safety wire is
securely fixed to the Motor Shaft.
Make sure the safety wire is slanting at 45° and not contacting to the Motor
surface.
Check Point Installation
4. Blade hole must be locked
to Cover Hook.
Make sure all the Blades are tightly screwed.
Check Point Installation
5. Upper Canopy is securely
fixed & screw.
Make sure there is at least 5mm gap between Upper Canopy and Ceiling.
Important Point For Safety And Performance
1.
Do not use ordinary pipe to replace standard pipe supplied by the manufacturer. It may
not withstand high load or torque created and can cause material failure. E.g.. Conduit
pipe.
Standard pipe supplied by factory:
Black pipe grade A Inside diameter 17.0mm
Black pipe grade A Inside diameter 17.0mm
2.
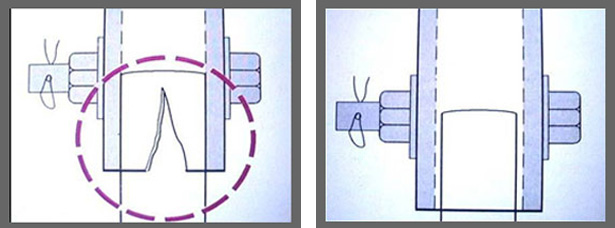
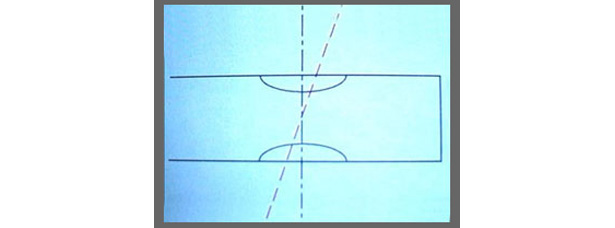
Manual drilling of pipe can cause hole slanting.
If it happens, fan will be wobble and in the worse condition the bolt will worn out.
3.
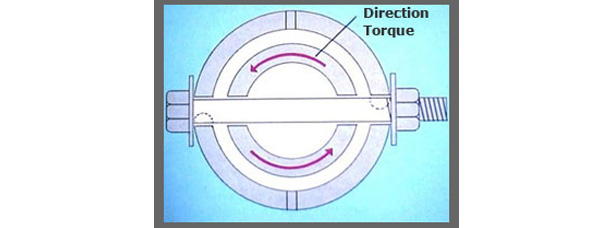
The bolt and nut must be tightened firmly.
If it is not fully tighten, the bolt will easily worn out due to torque action during
each starting action.
4.
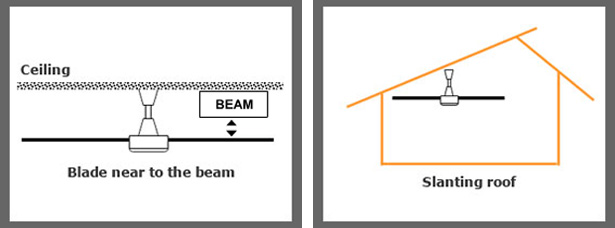
Do observe this installation condition that could lead to poor performance.
I) Beam within swipe distance
II) Slanting roof
III) Inside Dome
II) Slanting roof
III) Inside Dome
Ceiling Fan Installation/ Selection Guide
1.
INSTALLATION OF ONE UNIT CEILING FAN
The main features of a ceiling fan is to move the entire air in the room, not
creating a local wind as in other fans
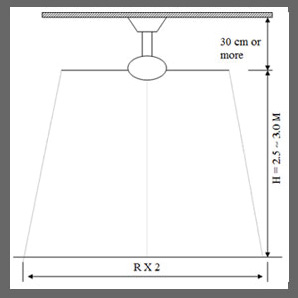
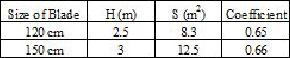
To determine the model and mounting position, consider the condition below: H :
distance from blade to floor (meter)
R : radius of effective floor space of wind spread (meter)
S : effective floor area (meter²) Calculation Formula
R : coefficient x H
S :ηR² , where η = 3.14
S : effective floor area (meter²) Calculation Formula
R : coefficient x H
S :ηR² , where η = 3.14
2.
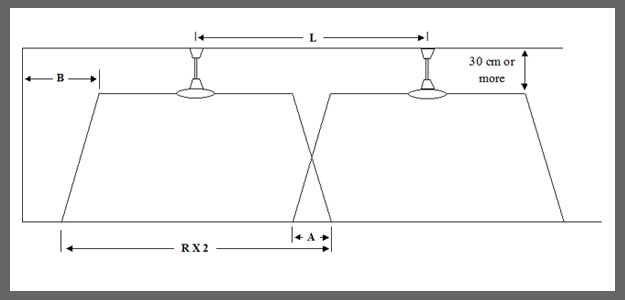
CALCULATION IF MORE THAN ONE UNIT REQUIRED
L : Distance between ceiling Fan to another (pitch in meter)
A : Distance of overlapping air throw between fan
B : Distance between tip of fan to wall
BL: Blade length (meter)
L : (RX2) - 0.4 , where 0.4 is maximum allowable overlapping of air throw between fan
L : (RX2) - 0 , if minimum A = 0
To calculate B = R - BL
A : Distance of overlapping air throw between fan
B : Distance between tip of fan to wall
BL: Blade length (meter)
L : (RX2) - 0.4 , where 0.4 is maximum allowable overlapping of air throw between fan
L : (RX2) - 0 , if minimum A = 0
To calculate B = R - BL
Stream Of Wind Movement
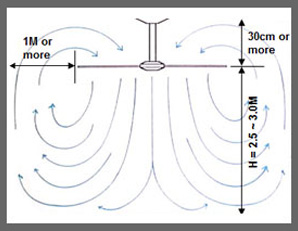
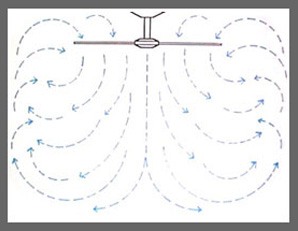
1.
The stream of wind movement is smooth and steady. The
delivery and coverage area is maximum.
Installation Condition :
Ceiling Fan installation height ≥ 30 cm.
Height from floor 2.5 ~ 3.0 meter
Blade distance between wall side ≥ 1 meter
Height from floor 2.5 ~ 3.0 meter
Blade distance between wall side ≥ 1 meter
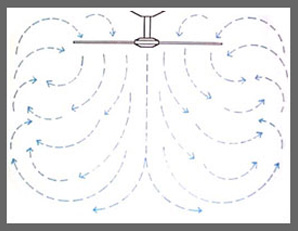
2.
Room size too small. The stream of wind movement is not steady and air
turbulence is created. This condition can cause the fan wobbling and noise may
also be created.
Recommendation :
To install small size ceiling fan (120cm / 48").
3.
The ceiling fan installation height < 30cm (too close to the ceiling). The
stream of wind is inferior and efficiency drops and noise may be created.
Recommendation :
To increase the ceiling fan pipe > 30cm (minimum).
Trouble Shooting
Causes Of Fan Noisy And Action To Improve
Causes Of Fan Wobbling And Action To Improve
Maintenance & Cleaning
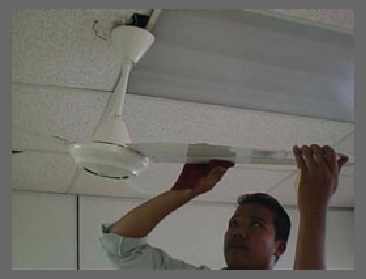
-
Check the fan condition annually.
Check points: Loosened screws, Safety Wire conditions, motor shaft damage, etc.If problems occurred, stop using the fan. Then refer to service, sales or maintenance shop. - Keep the fan clean by wiping away dirt with a clean soft cloth, ordinary soap and water. Do not use solvents such as gasoline or petrol.
- Do not paint the Blades. If damage, order new set of Blades (3 pcs) from the service or sales shop.
- If the product is broken or damaged, please dismantle the product or replace with the new product. This is to prevent the Ceiling Fan from dropping.
